Getting started
Add a personal touch to your clothing, accessories, or home decor with custom iron-on patches. It’s easy to make your own custom patches for a club, a special event, or just for fun. This guide will walk you through the steps of creating your own custom iron-on patches, with expert tips from Aqua Digitizing.
Here’s what you’ll need
Make sure you have all the supplies before you start making iron-on patches:
The patch should be made of cotton or polyester.
Turn your patch into an iron-on with Heat n Bond.
You’ll need scissors or a rotary cutter to cut your fabric and patch.
Applying the adhesive and attaching the patch with an iron and ironing board.
For stitching your design, you’ll need embroidery thread and a needle.
Use a design template or make your own.
How to design your patch
Making a custom iron-on patch starts with designing it. Hand-draw your design on paper if you’re confident in your artistic skills. You can also use graphic design software or hire someone like Aqua Digitizing. Make sure your patch design is the right size and has clear, bold lines to make sewing easier.
Getting the fabric ready
Now it’s time to transfer your design to fabric:
You’ll need a piece of fabric that’s slightly bigger than your design.
Design Transfer: Use a lightbox or a well-lit window to trace your design onto the fabric. Digital designs can be uploaded directly to embroidery machines.
Patch embroidering
Here’s how to make your design come to life:
You can hand stitch your design by using embroidery thread and a needle.
Embroidery machine: Follow the embroidery machine’s instructions to stitch the design on the fabric. Embroidery is simplified with Aqua Digitizing’s digitized designs.
How to Iron-On Adhesive
The next step is to turn your fabric into an iron-on patch:
Put the Heat n Bond adhesive on the back of your patch fabric.
Iron the adhesive to the fabric, making sure it covers the entire back.
Once the patch has cooled, cut it out along the lines you drew.
Here’s how to attach your patch
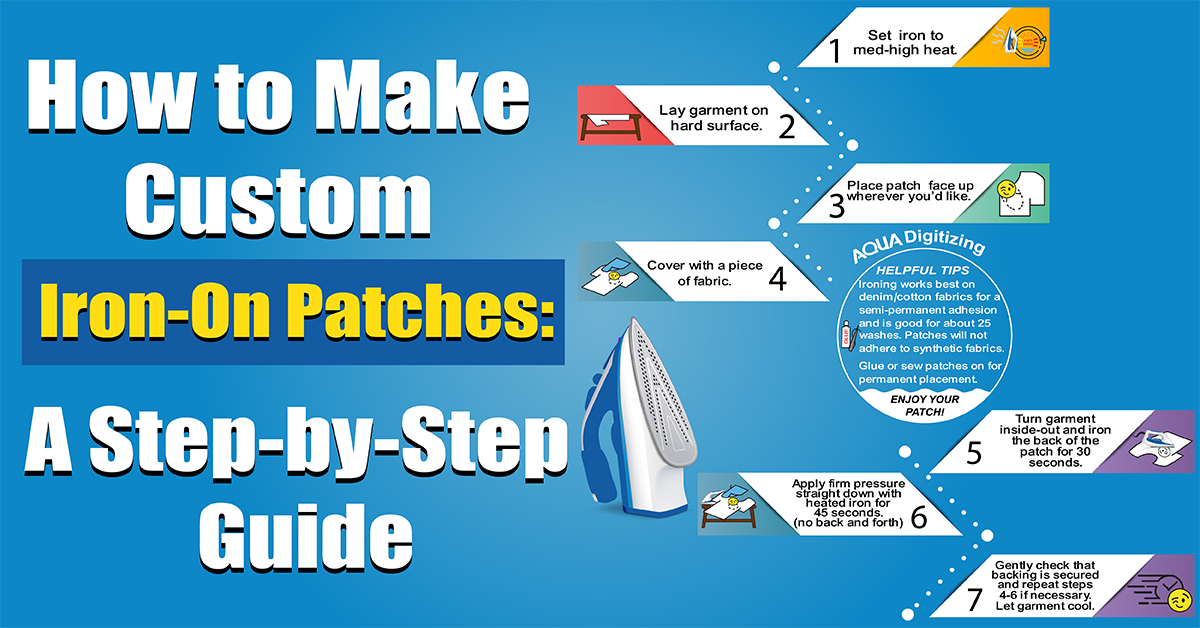
Now you can attach your custom iron-on patch:
Attach the patch to your clothing or accessory where you want it.
Put a piece of cloth over the patch to protect the embroidery.
Press the Patch firmly for 10-15 seconds with a hot iron.
It’ll stay on your item if you let it cool.
Final thoughts
It’s fun and creative to make custom iron-on patches that express your style. If you’re making patches for yourself or as gifts, follow these steps for professional-looking results. With the right materials and a little creativity, you can make unique patches. Have fun crafting!
 315-215-0681


