Embird Stitch Density: A Comprehensive Guide for Embroidery Enthusiasts
For stunning embroidery designs, you need to understand stitch density. Learn how to change stitch density in Embird if you’re an embroidery enthusiast. You can adjust stitch density to make your creations both functional and visually appealing, whether you’re designing for durability, comfort, or aesthetics.
You’ll learn why stitch density is important, why you might need to adjust it, and how to change it in Embird in this guide. Let’s get started!
Stitch Density: What Is It?
In embroidery, stitch density refers to the spacing between stitches. Whether the stitches are compact or spread out directly affects the look, texture, and durability of the design. Here’s an example:
Dense stitching creates a rich, full design, but it can also make the fabric stiff and bulky.
For delicate fabrics, low stitch density creates a softer, lighter look.
You need to strike the right balance if you want professional-quality embroidery. You can check out this beginner’s guide to embroidery digitizing if you’re new to it or want to learn more.
What’s the point of adjusting stitch density in Embird?
Adjusting stitch density is important for several reasons:
Optimize for fabric: Different fabrics need different stitch densities. Thin fabric can pucker from dense stitching, while thick fabric may look sparse from loose stitching.
Maintain detail in intricate patterns by using different densities in certain areas.
Create desired texture by adjusting density. This will make your design stand out or feel smoother.
You can tailor your designs to match your creative vision and materials with Embird’s stitch density settings.
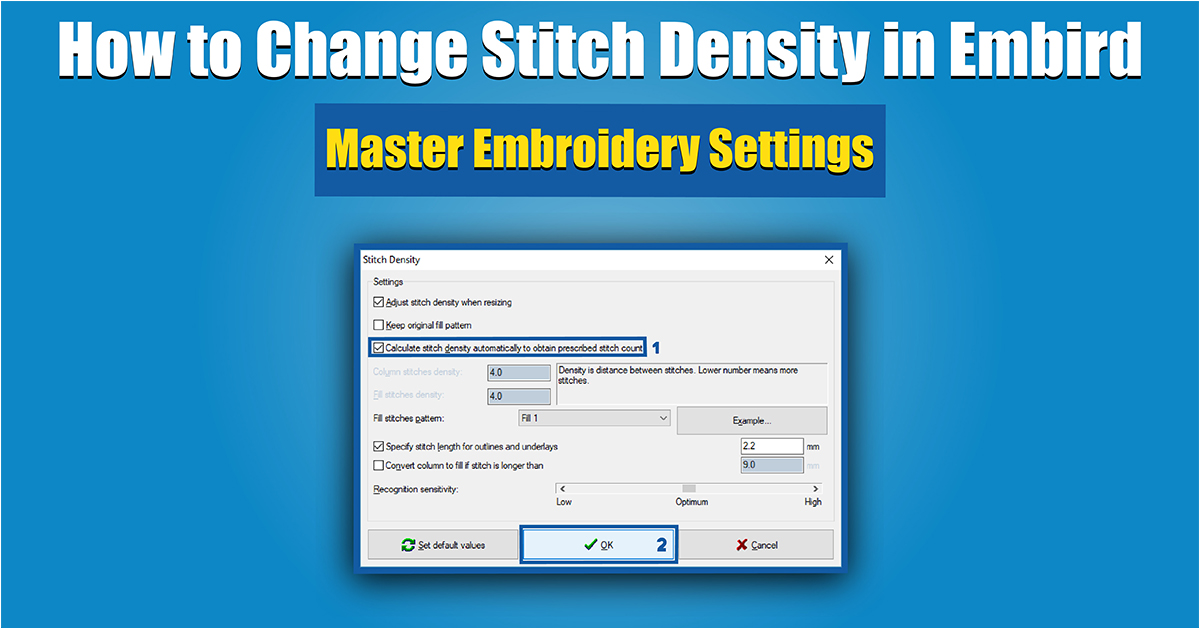
How to change stitch density in Embird step-by-step
The best way to adjust stitch density in Embird is to follow these steps:
Embird Editor – Open Your Design
Load your embroidery file into Embird.
You can make adjustments in the Editor module.
Choose a design area
Use the selection tool to highlight the part of your design you want to change. It’s up to you whether you want to focus on specific sections or change the whole thing.
Densify the stitches
Select ‘Density’ from the ‘Parameters’ menu.
Change the stitch count. Increasing the number tightens the stitches, while decreasing it loosens them.
Check out your design and test it
To see the changes, use the software’s preview feature.
Make a test stitch on scrap fabric similar to your project material. Make sure your adjustments work.
Make sure your embroidery designs are flawless by learning how to change stitch density in Embird.
Embird Stitch Density Tips
Experiment with fabrics: Always test on the specific fabric you’re going to use. Under different stitch densities, different materials behave differently.
Stay away from overly dense stitching, which can damage fabric or cause thread breakage, and sparse designs that look unfinished.
Take advantage of tutorials and resources: Online platforms like Aqua Digitizing offer valuable tips and tutorials.
Avoid these common mistakes
Overcompensating with density: Adding too many stitches can make your design bulky and inflexible. Aim for balance.
Neglecting Fabric Type: Special considerations may need to be made when adjusting stitch density for stretchy or delicate fabrics.
Skip the test stitches: Skipping the trial run can lead to disappointing results. Make sure your design works before you finalize it.
Change stitch density in Embird and elevate your embroidery work by avoiding these pitfalls.
Final thoughts
Embird’s stitch density adjustment is a crucial skill that can make your embroidery projects look amazing. When you understand stitch density and practice with different settings, you’ll unlock your designs’ full potential. You can change stitch density in Embird to make your embroidery look polished, professional, and perfectly tailored, whether you’re working with intricate patterns or experimenting with new fabrics.
Explore Embird’s capabilities, and don’t be afraid to test your skills. Have fun stitching!
 315-215-0681


